Setting Up Alerts in Streamerflux
-
Setting Up Alerts in Streamerflux
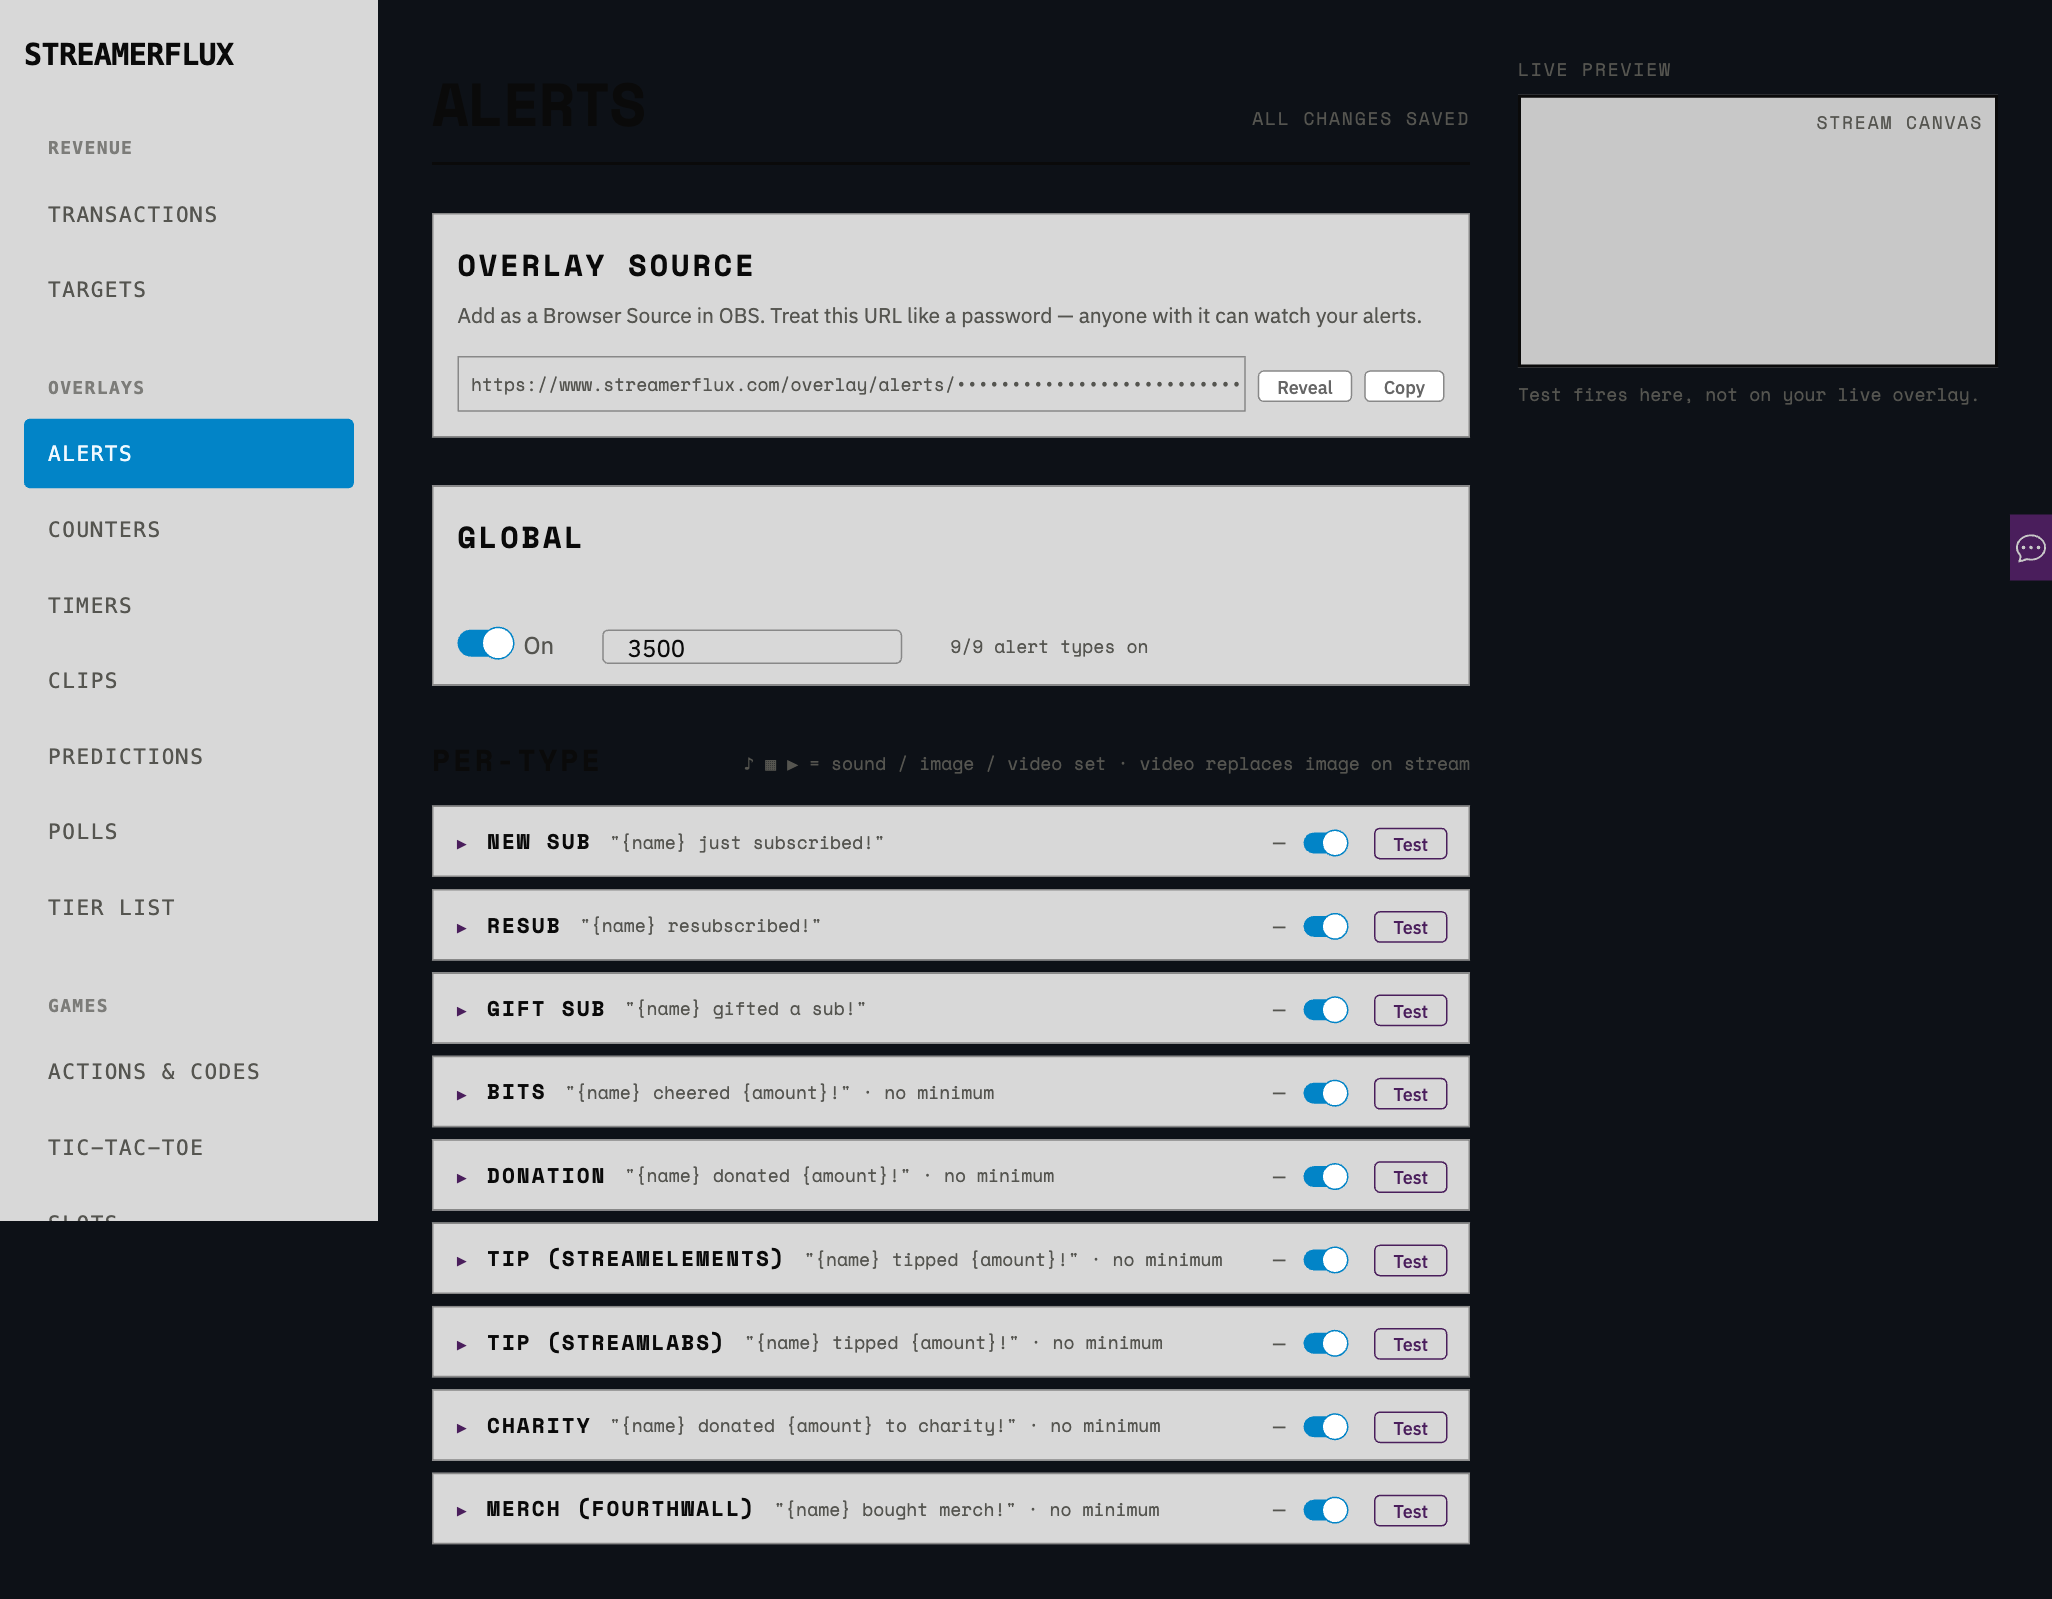
Alerts are the on-screen popups your viewers see when something happens on your stream - a new subscriber, a cheer, a donation, a merch sale. Streamerflux gives you one overlay that listens for all of those events and fires a customizable alert (text, sound, image, or video) for each one. You add that overlay to OBS once, style each event the way you want, and Streamerflux handles the rest.
This guide walks through the whole Alerts panel end to end: connecting the overlay to OBS, setting global behavior, configuring each alert type, and testing before you go live. It is written for both new users and people who already know their way around the dashboard, so skip ahead if a section is old news.
Where to find it: Log in to Streamerflux, open the dashboard, and choose Alerts under Overlays in the left sidebar.
Before you start
You will get the most out of Alerts if you have these in place first:
- OBS Studio (or any software that supports a Browser Source - Streamlabs Desktop, XSplit, etc.).
- Your event sources connected under System > Integrations. Streamerflux can only fire an alert for an event it actually receives, so if you want donation or tip alerts, make sure the matching integration (StreamElements, Streamlabs, Fourthwall, and so on) is linked. Subscription and bits events come from your Twitch connection.
One thing worth knowing up front: the Alerts page saves automatically. The status next to the page title reads "All changes saved" once your edits are stored, so there is no Save button to hunt for. More on that near the end.
How the page is laid out
The Alerts panel is split into two columns:
- Left - Settings. Everything you configure: the overlay source, global options, and the per-type alert rows.
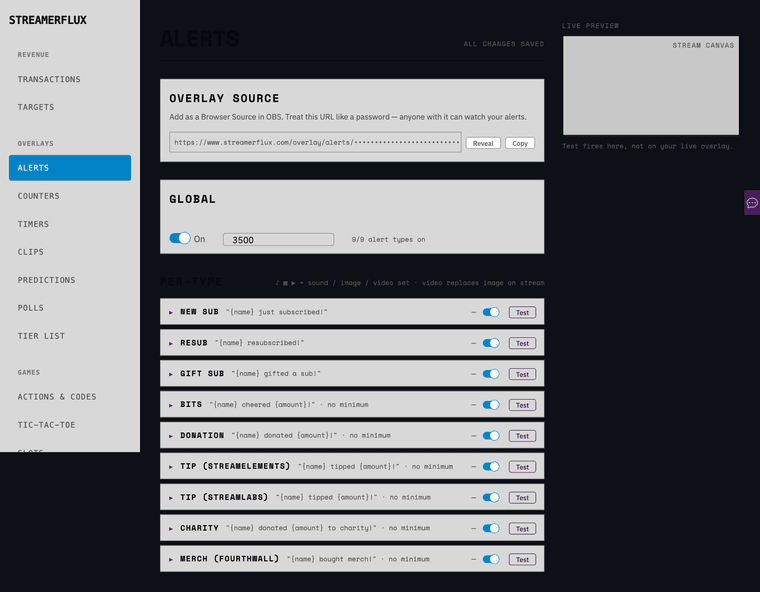
- Right - Live preview. A stream-canvas preview where your test alerts play. This is a rehearsal space - test alerts fire here, not on your real overlay in OBS, so you can experiment mid-stream without your viewers seeing it.
Step 1: Add the overlay to OBS
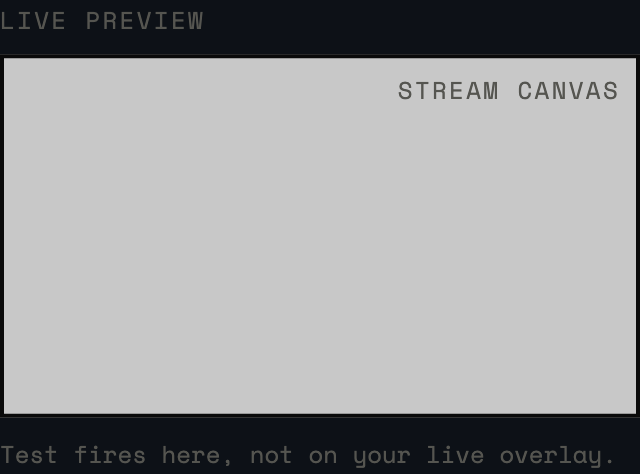
At the top of the settings column is the Overlay source card. This is the single URL that carries all of your alerts into your streaming software.
- Click Reveal to show the URL (it is masked by default), then Copy.
- In OBS, add a new Browser Source.
- Paste the URL into the source's URL field.
- Size the browser source to match your canvas (1920x1080 is typical for a full-canvas overlay).
That is it - the overlay stays connected and will play alerts as events come in.
Treat this URL like a password. Anyone who has it can watch your alerts feed. Do not paste it into public chats, on-screen, or into a shared doc.
Regenerating the URL
If your overlay URL ever leaks, click Regenerate overlay URL. This invalidates the old URL immediately - any OBS browser source still using the old one will go blank until you paste in the new URL. So after regenerating, remember to update the Browser Source in OBS.
Step 2: Set the global options
The Global card controls behavior that applies to every alert.
- On / Off - the master switch for the whole alert system. When this is off, nothing fires, regardless of individual type settings. Leave it on for normal use.
- Display duration (ms) - how long each alert stays on screen, in milliseconds. The default is 3500 (3.5 seconds). Raise it if your alerts feel rushed, lower it if they linger.
- Type counter - a small readout like "9/9 alert types on" so you can see at a glance how many alert types are currently enabled.

Step 3: Configure each alert type
Below Global is the Per-type section, where you style each kind of event individually. Streamerflux ships with nine alert types:
Alert type Fires when Default message New Sub Someone subscribes for the first time {name} just subscribed!Resub Someone renews their subscription {name} resubscribed!Gift Sub Someone gifts a sub {name} gifted a sub!Bits Someone cheers with bits {name} cheered {amount}!Donation A donation comes in {name} donated {amount}!Tip (StreamElements) A StreamElements tip {name} tipped {amount}!Tip (Streamlabs) A Streamlabs tip {name} tipped {amount}!Charity A charity donation {name} donated {amount} to charity!Merch (Fourthwall) Someone buys merch {name} bought merch!Each row has an on/off switch and a Test button right on its header. Click the row (the caret on the left) to expand its settings.
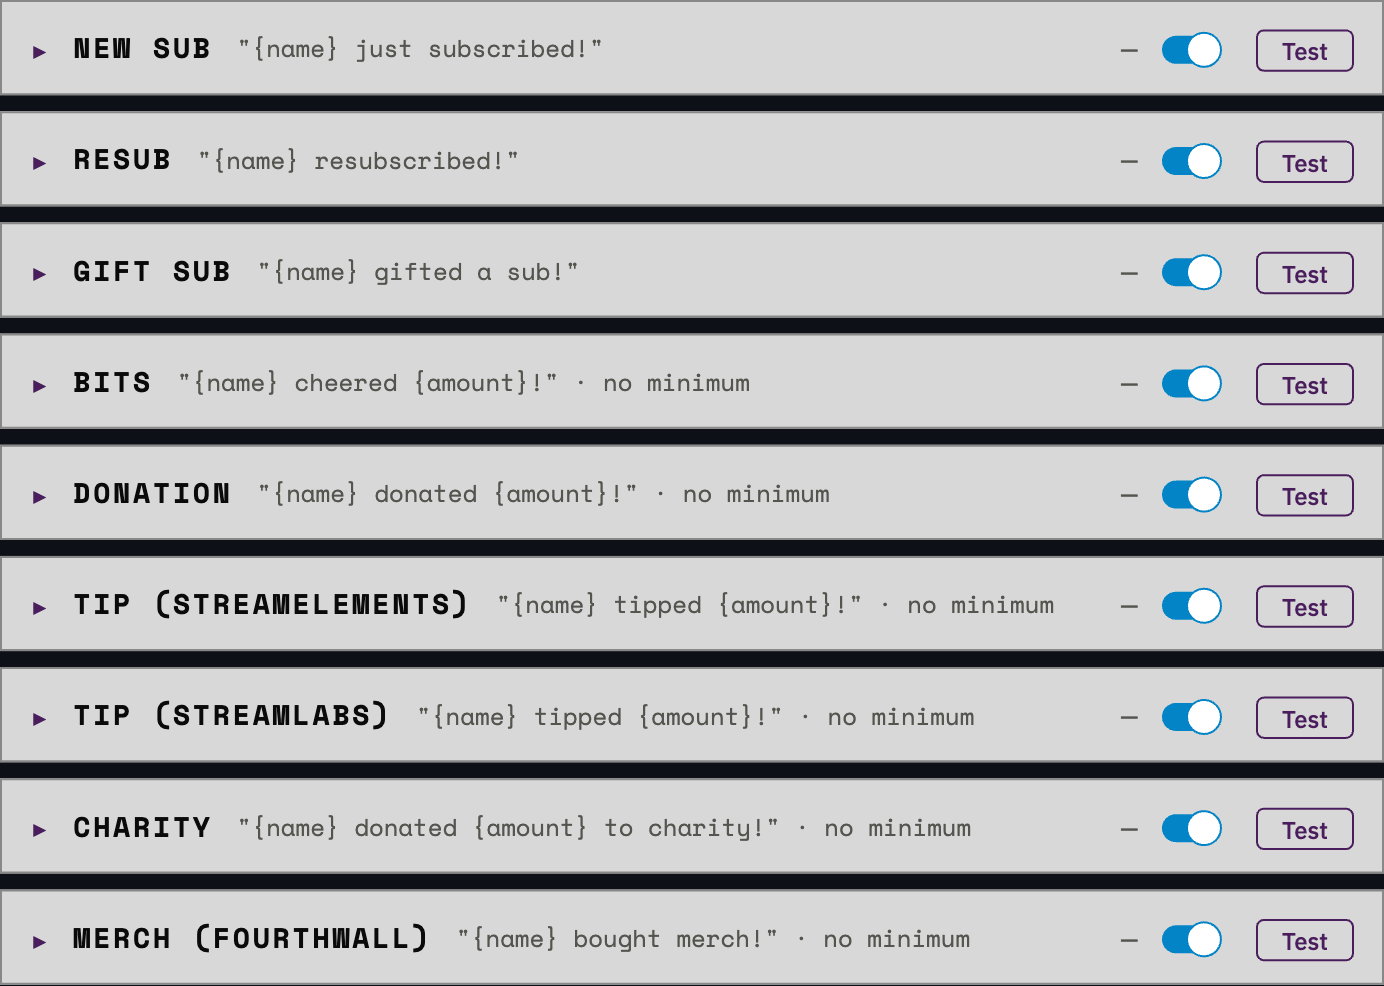
The message and placeholders
The Message field is the text that appears in the alert. You can write anything you like and drop in placeholders that Streamerflux fills in at runtime:
{name}- the viewer's name{amount}- the bits/donation/tip amount (for amount-based types){tier}- the subscription tier{message}- the message the viewer left with their event
For example,
{name} cheered {amount}! Thank you!becomes "Katie cheered 500! Thank you!" on screen.Sound, image, and video
Each alert type can have its own media. In the expanded row you will see three buttons:
- Add sound (♪) - accepts MP3, OGG, or WAV.
- Add image (▦) - accepts PNG, JPG, GIF, or WEBP.
- Add video (
 ) - accepts WEBM or MP4.
The small ♪ ▦
icons in each row header are a quick legend showing which media that type currently has set. One rule to remember: if a type has both an image and a video, the video wins on stream - the video replaces the image when the alert fires.Amount-based extras (Bits, Donations, Tips, Charity, Merch)
The money-related types have two extra options that the subscription types do not:
- Min amount - a threshold. Leave it blank for "no minimum" (every event fires an alert), or set a number so the alert only fires when the amount is at or above it. Handy for filtering out tiny cheers.
- Exact-amount alerts - special alerts that fire in addition to the normal one when the amount matches exactly. Click + Add exact amount to set one up. This is how you build a "someone donated exactly 100 - play the big animation" moment on top of your standard donation alert.
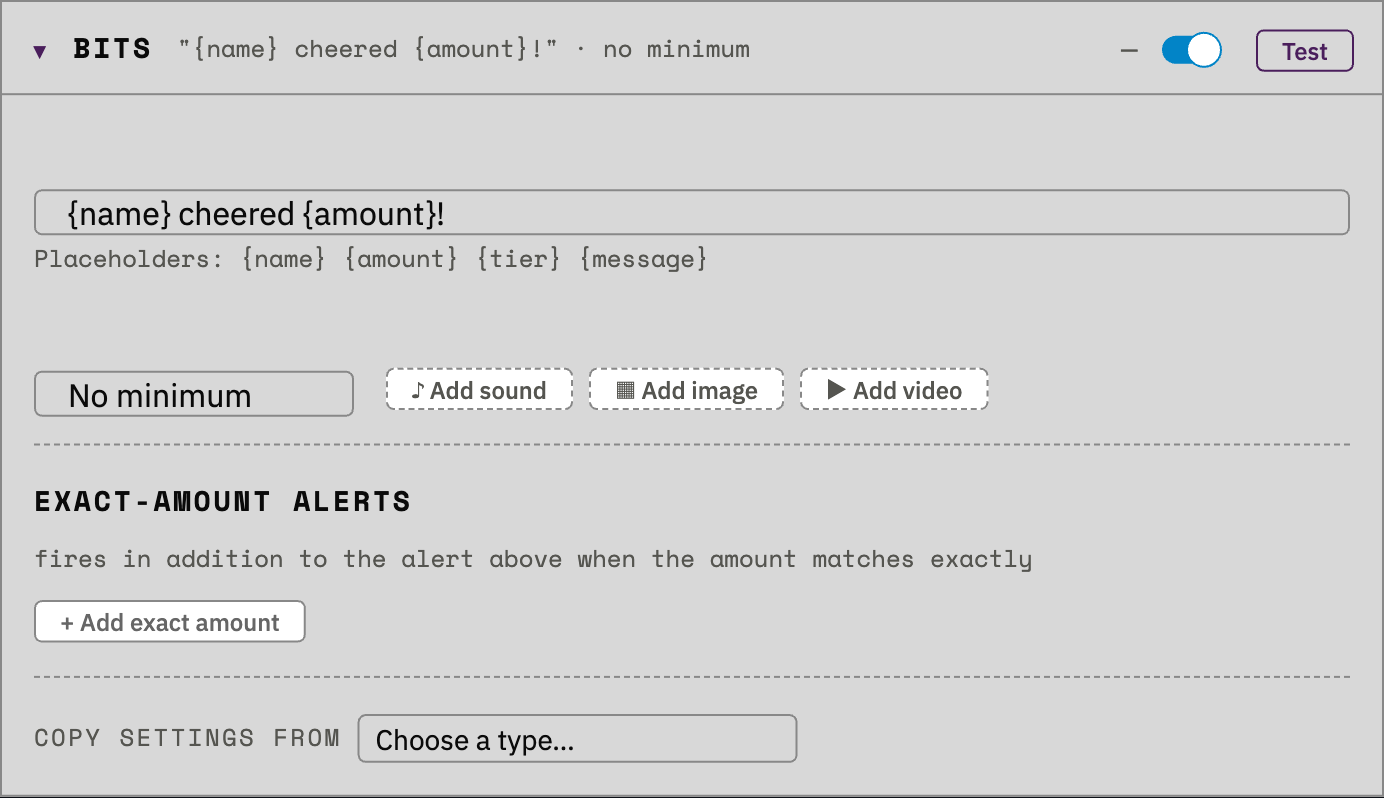
Copy settings from another type
At the bottom of each expanded row is Copy settings from, a dropdown of your other compatible alert types. Pick one to clone its configuration into the current type - a fast way to keep all your tip and donation alerts looking consistent without redoing the work each time.
Step 4: Test before you go live
Once a type is configured, click its Test button. The alert plays in the live preview pane on the right, not on your actual overlay in OBS, so you can test safely at any time - even mid-stream.
Watch for:
- The message reads the way you want with the placeholders filled in.
- The sound level is reasonable.
- The image or video displays correctly and is not cut off.
- The display duration feels right - adjust the global value if alerts vanish too fast or hang around too long.
If you want to confirm it also works end to end in OBS, you can trigger a real (or platform-test) event and watch your Browser Source.
Saving your work
Streamerflux autosaves. When your edits are stored, the status by the page title shows "All changes saved."
If you try to navigate away from the Alerts page with edits still pending, Streamerflux warns you with an "Unsaved changes" prompt and offers to Save & leave, Discard & leave, or Cancel. If you see it, choose Save & leave to keep your work.
Quick tips
- Keep durations short. 3 to 4 seconds is plenty for most alerts. Long durations stack up during a hype moment and fall behind.
- Use Min amount to cut noise. On a busy stream, a small minimum on bits or tips keeps low-value events from spamming the overlay.
- Save exact-amount alerts for milestones. They are perfect for round numbers or your subscription price - a bigger reaction for a bigger moment.
- Build one type, then copy. Configure your best-looking donation alert first, then use "Copy settings from" to propagate the style to the other money types.
- Re-test after big changes. New media or a new message is worth a quick Test click before you rely on it live.
Troubleshooting
Alerts do not appear in OBS.
Check that the Overlay source URL in your Browser Source matches the current one in the dashboard. If you regenerated the URL, the old source goes blank until you paste the new one. Also confirm the Global switch is on and the specific type's switch is on.A specific event never fires an alert.
The event source is probably not connected. Open System > Integrations and confirm the matching integration is linked (for example, Streamlabs for Streamlabs tips, Fourthwall for merch).Test works but real events do not (or vice versa).
The Test button plays in the preview pane only. If Test looks right but nothing shows live, the issue is the OBS Browser Source or the integration, not your alert styling.You shared or leaked the overlay URL.
Click Regenerate overlay URL, then update the Browser Source in OBS with the new URL.

Hello! It looks like you're interested in this conversation, but you don't have an account yet.
Getting fed up of having to scroll through the same posts each visit? When you register for an account, you'll always come back to exactly where you were before, and choose to be notified of new replies (either via email, or push notification). You'll also be able to save bookmarks and upvote posts to show your appreciation to other community members.
With your input, this post could be even better 💗
Register Login